The HTML to image block takes any text or HTML and outputs a screenshot in PNG format. Images are extremely important for good search engine optimisation so this is an easy way to achieve it – without relying on generative AI (but we can do the latter as well).
To get your creative juices flowing with this module imagine the following example:
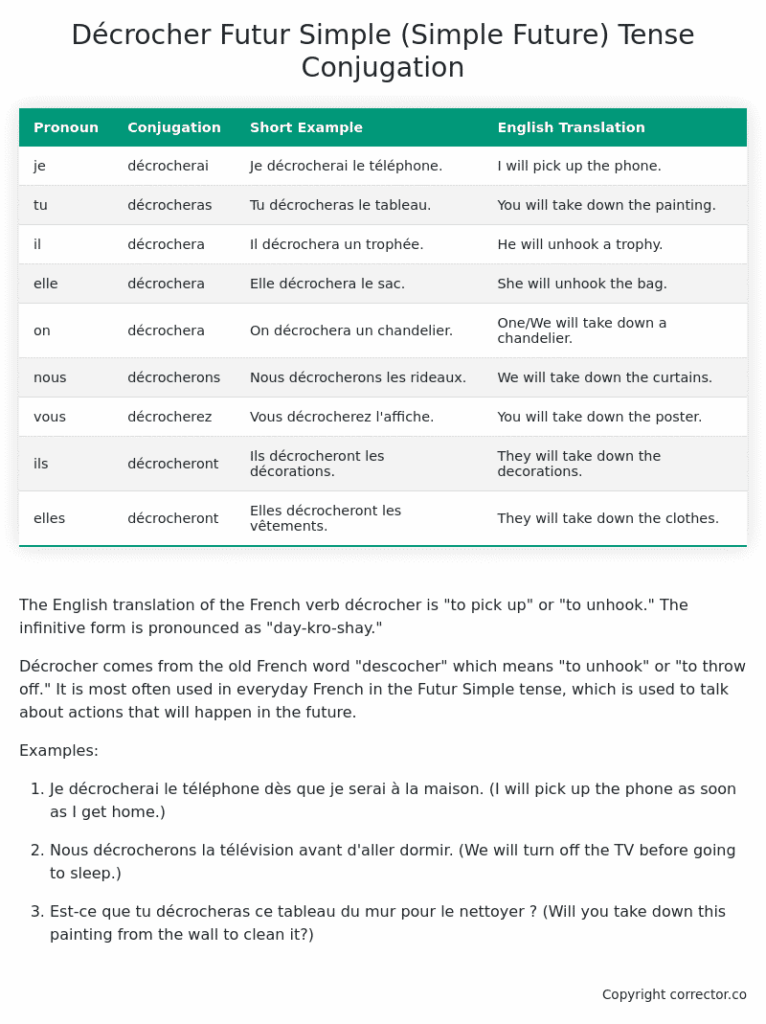
You have a French grammar site and want to create conjugation tables of the top 1,000 verbs. When people search for conjugations Google may suggest images matching their description, which almost no-one targets effectively.
Simply create your conjugation with the verb input along with ChatGPT assistance then place that output into this HTML to Image Block. A conjugation table will be included in your post! This is something I’ve done, evidence in the next image:

HTML to Image Options
You are presented with a simple input box. In here you can include shortcodes referencing other module outputs, mixed in with any other HTML.
For example, this has a red H2 heading followed by the output from a previous block {{tb0}}:
<h2>My Table Heading</h2>
<div class=”redbg”> {{tb0}} </div>
Alignment: How the image is aligned to your content. Left, center, right or none. I advise you try “none” at first, leaving it up to your template to define.
Set as Featured: Make this image the featured image for the post.
Generated Image Width: How large should the full size image be.
Display Image Width: The size of image displayed in the post. You should generally make this smaller than the generated image size. The displayed image will always link back to the original image if your reader wants to see it in more detail.
Padding: How much space should be left around the edges of the image. Generally 20px is an acceptable value.
Testing
The test function takes the global styles (defined at top of the page) and applies them to this output. The result is shown in an iframe, which is a browser within the webpage.

Leave a Reply